Adding a Profile Image (Avatar) to a Contact Database Record
A Contact Database record can include a profile image, also known as an Avatar in Accrisoft Freedom. A profile image helps users quickly identify the contacts in the Contact Database
Follow the steps below to add a Contact Database Avatar image to a contact's detail.
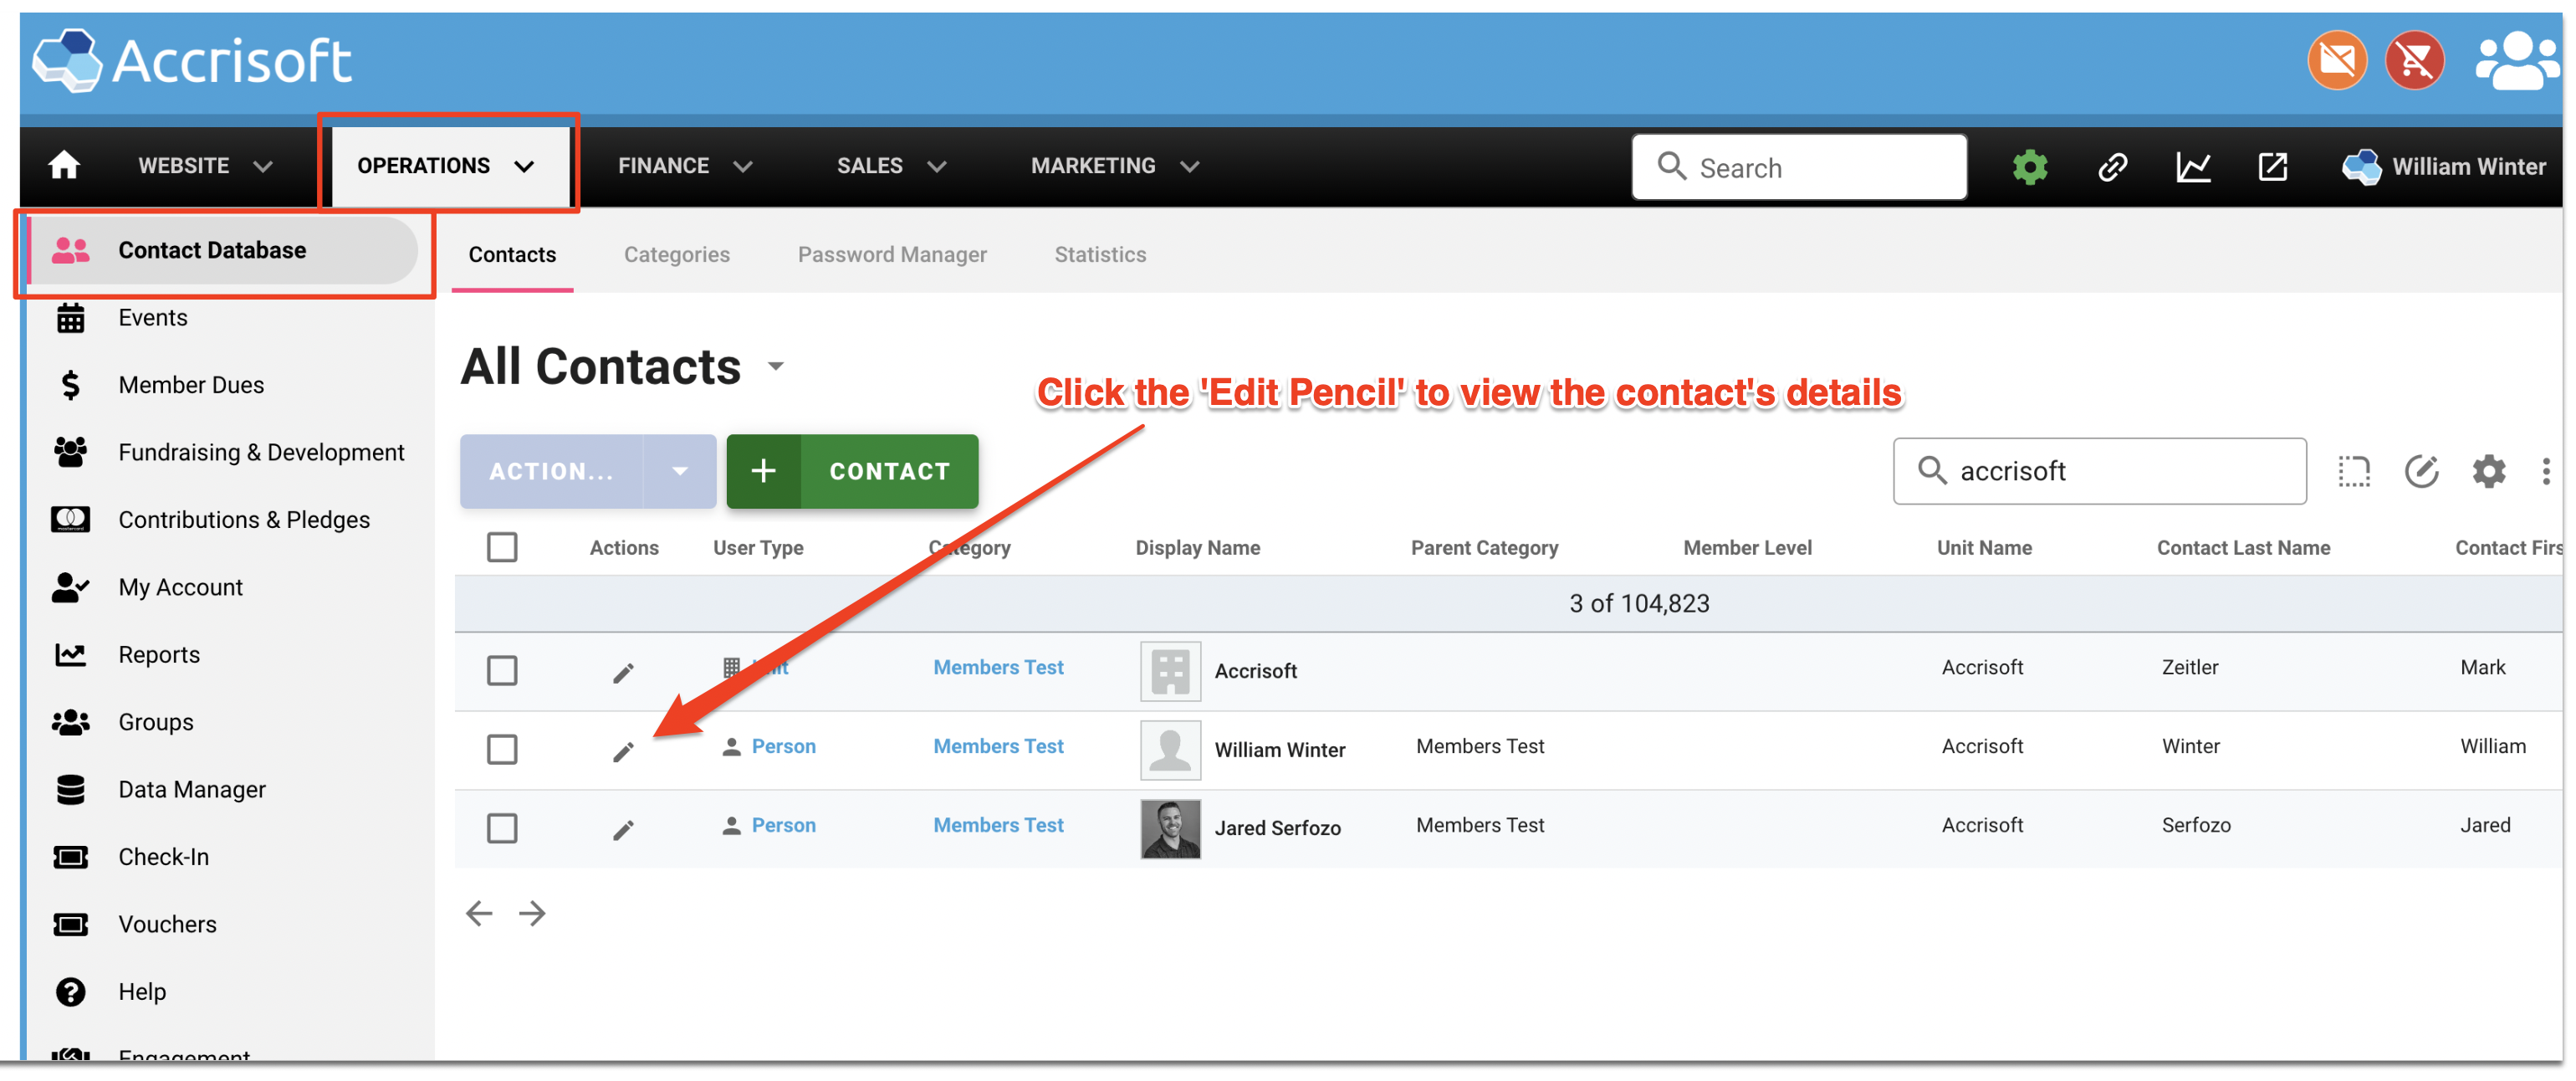
Begin by navigating to the Operations Application and click on the Contact Database Module.
Identify the contact that you wish to add an Avatar image to. Click the Edit Pencil for that record.
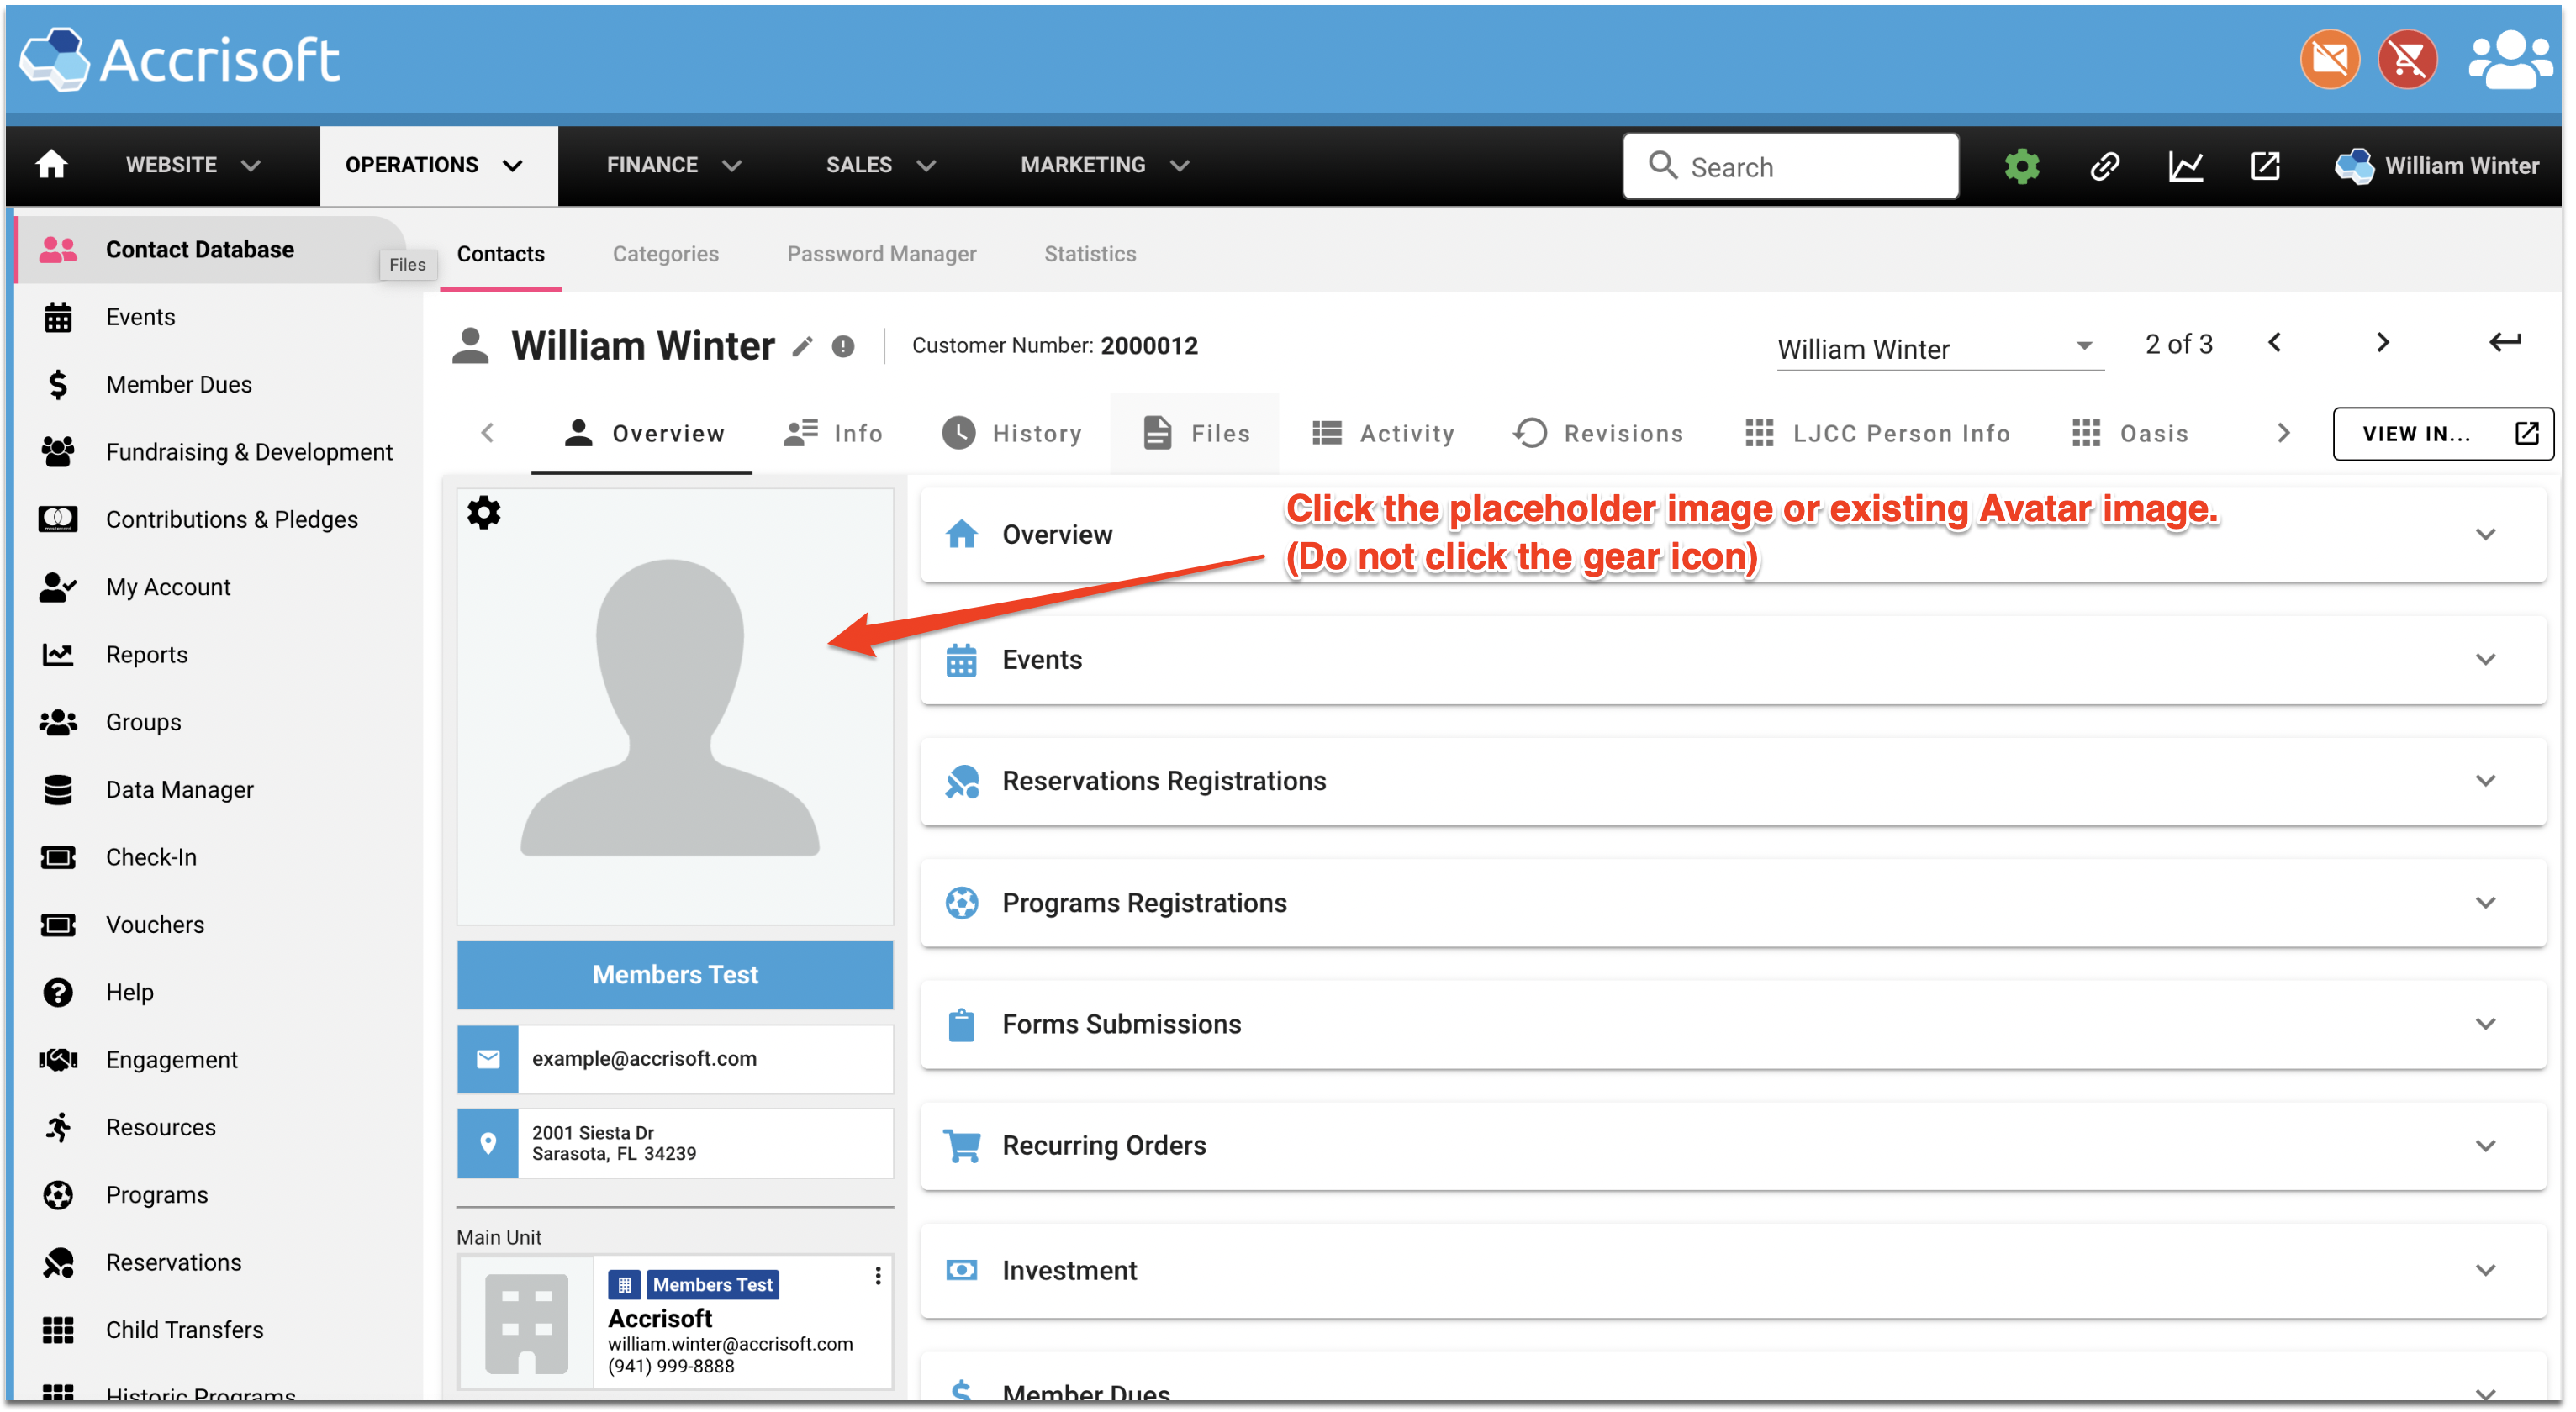
The contact's detail will open and present the Overview tab.
Click the placeholder image (or the existing Avatar if one already exists).
Do not click the 'Gear' icon, as that is for different settings.
The 'Change Avatar' window will appear.

Here you can add an image from a camera connected to the computer (web cam) or you can upload an image file from the computer.
To add from a web cam, click the blue 'Use Camera' button.
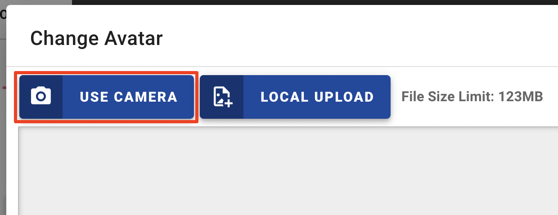
Note: Your web cam will need to be set up to be used by your web browser before this feature will work.
The 'Capture Image' window will open providing a preview of the camera's view of the subject.
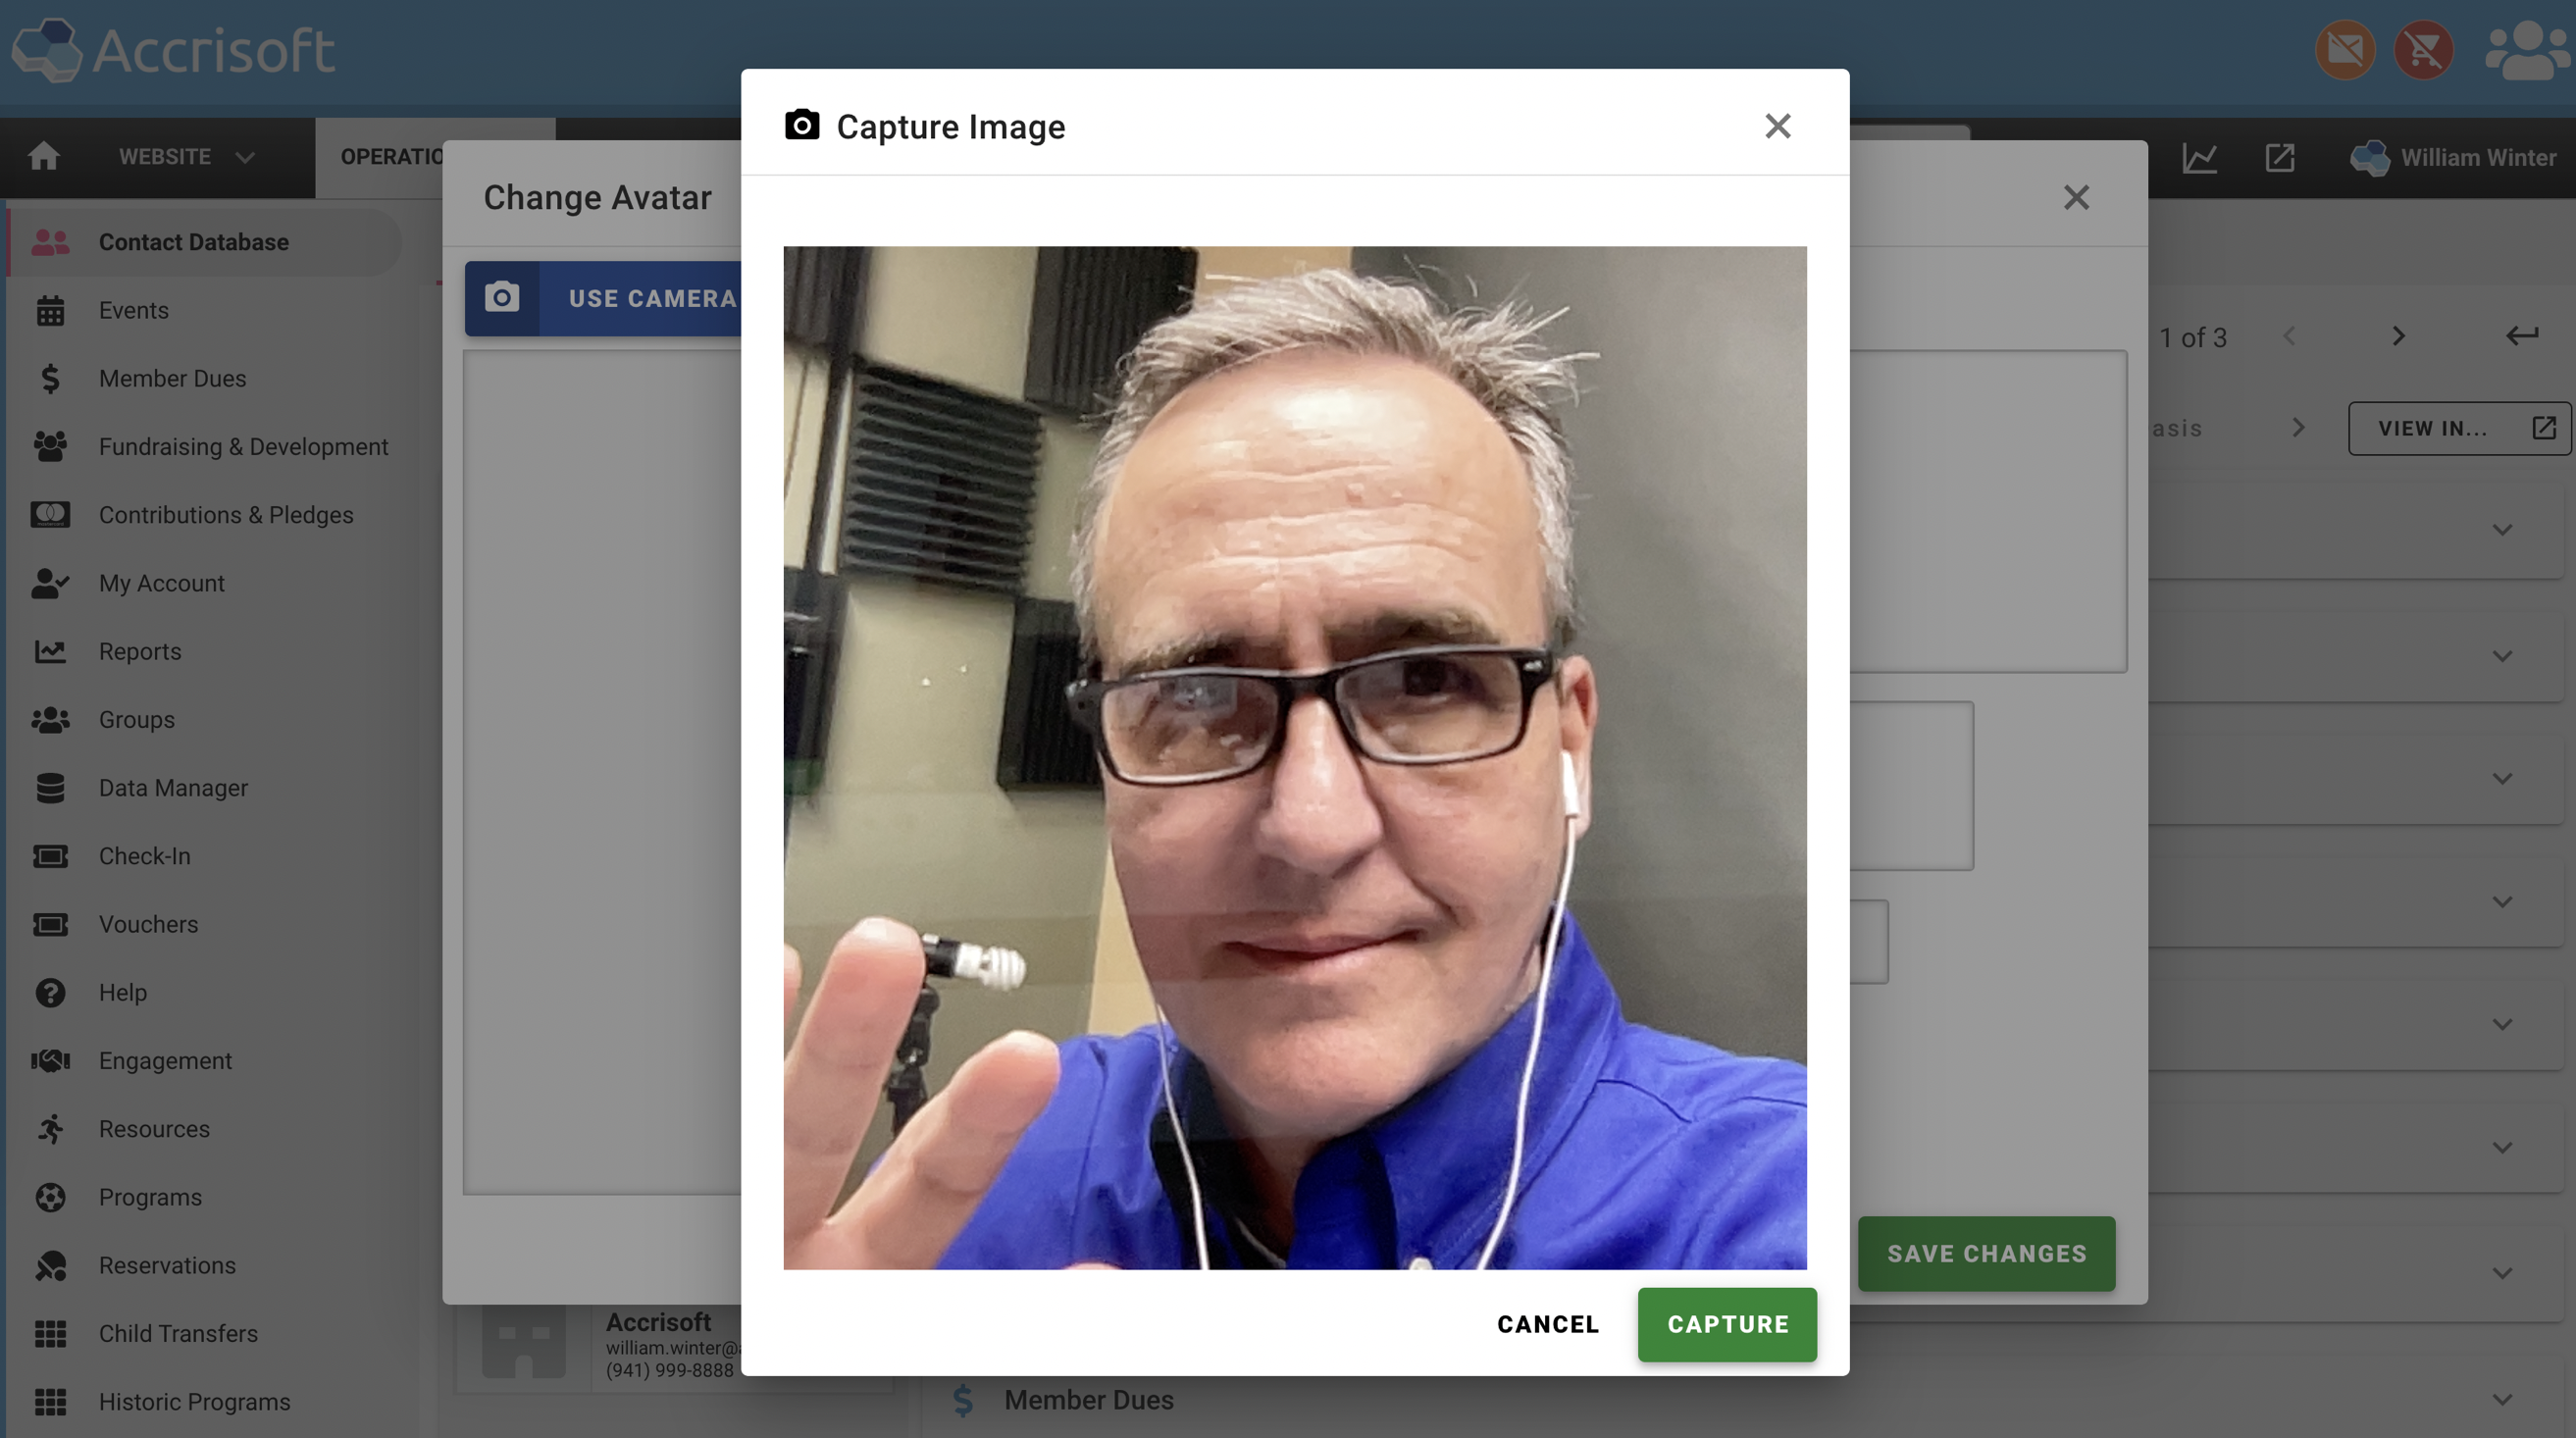
Frame the image in the window and click the green 'Capture' button.
Use the framing square to cover the area of the image to show as the Avatar.
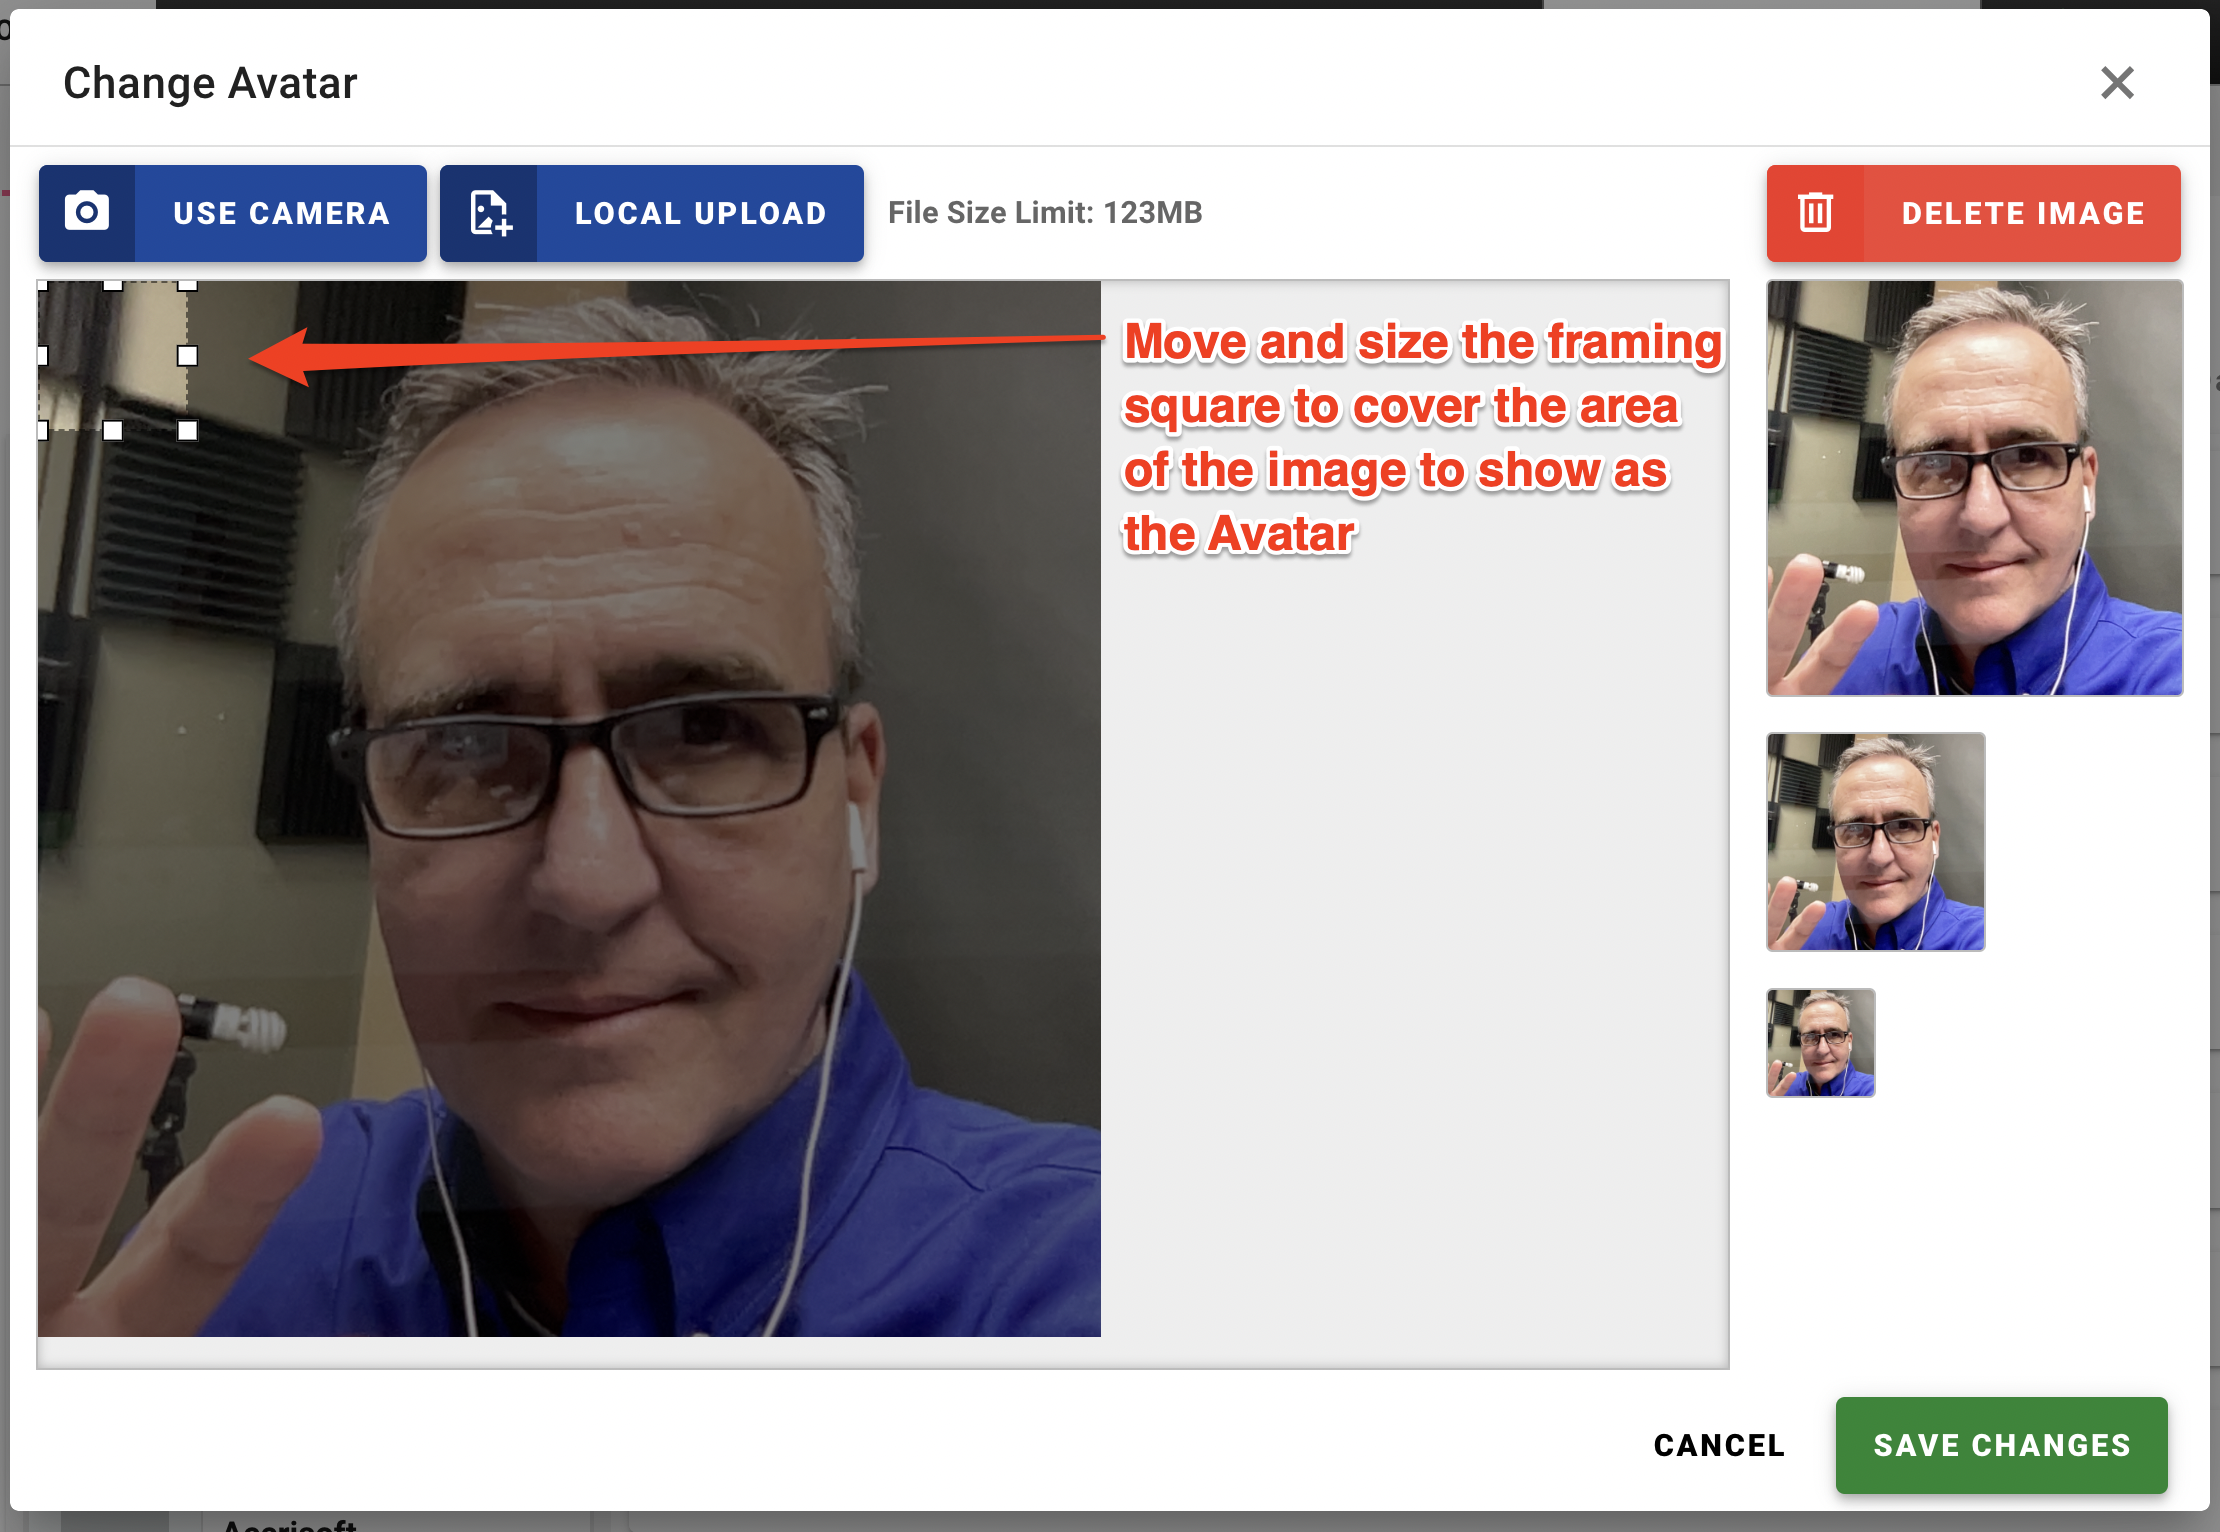
Click the green 'Save Changes' button to save the image as the Avatar.

To upload an image file from your computer, use the 'Local Upload' button in the Change Avatar window.

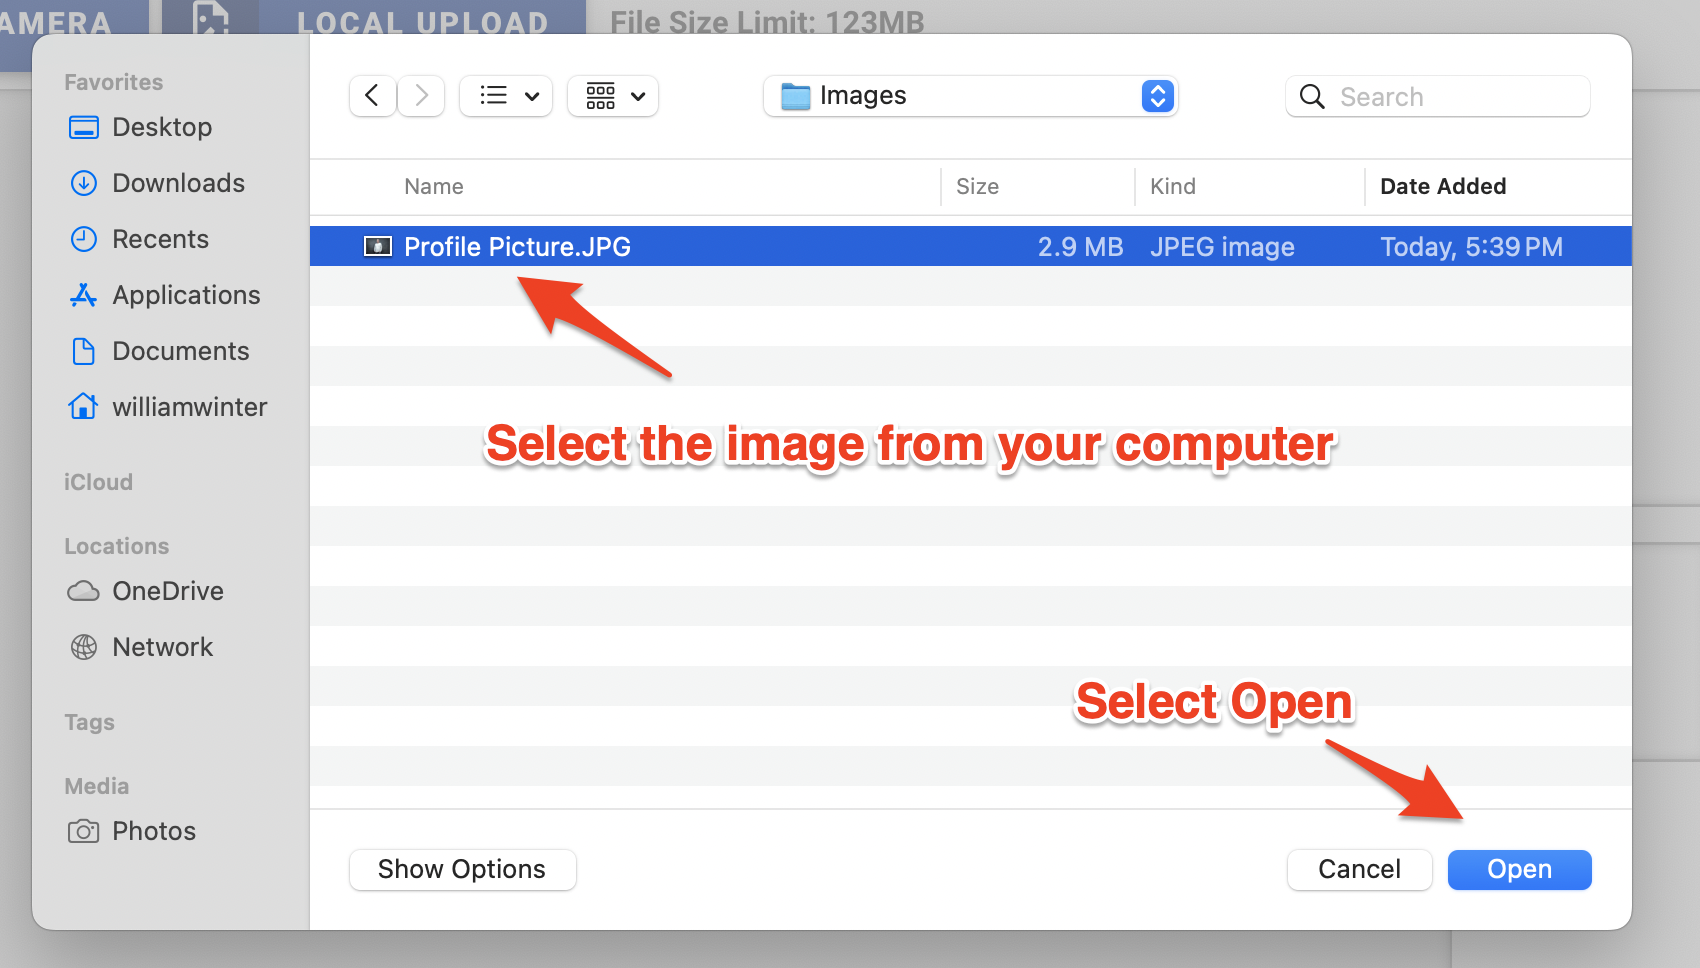
Once clicked, the system will present a file browser window. Navigate to where on your computer the image is located, select it and click the 'Open' button.
Use the framing square to cover the area of the image to show as the Avatar.
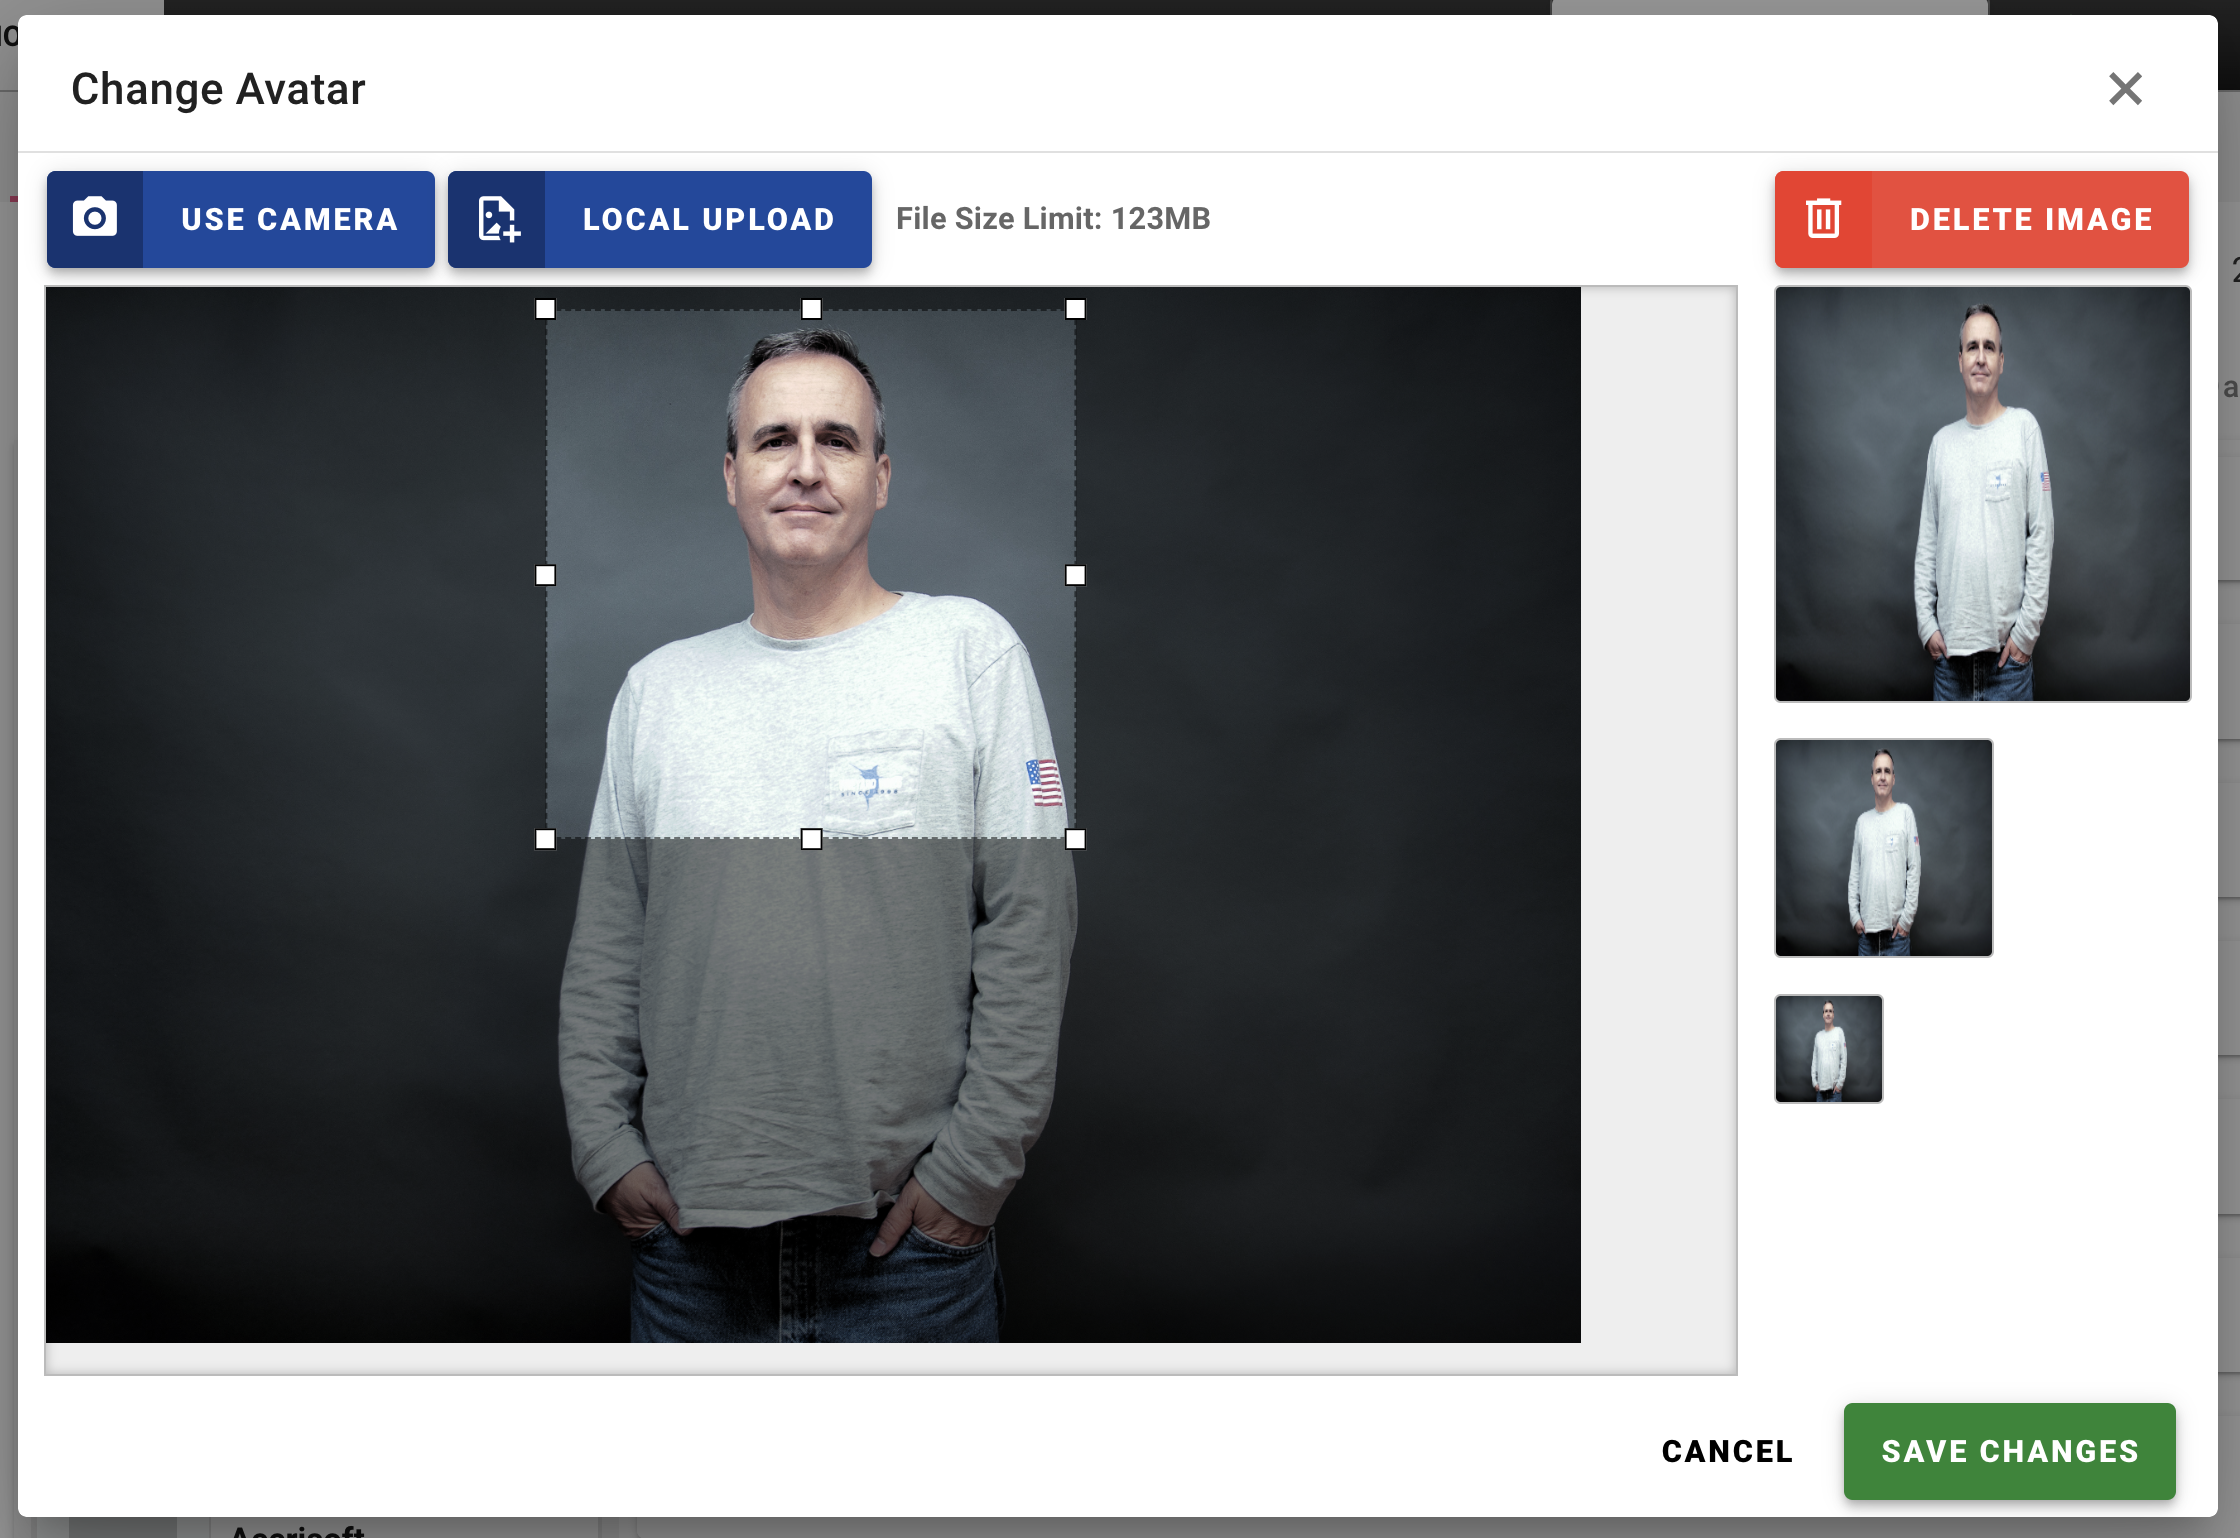
Click the green 'Save Changes' button to save the Avatar image.
To remove an Avatar image, click the red 'Delete Image' button.

Related to
![accrisoft_logo_med.png]](https://help.accrisoft.com/hs-fs/hubfs/accrisoft_logo_med.png?height=50&name=accrisoft_logo_med.png)