Converting a Billing Item to Installments
In this document the process to convert a regular Billing Item to Installment payments is provided.
Begin by navigating to the Ledger Card module of the Finance Application.
Select the Customer and find the item to convert in the Billing Items tab:
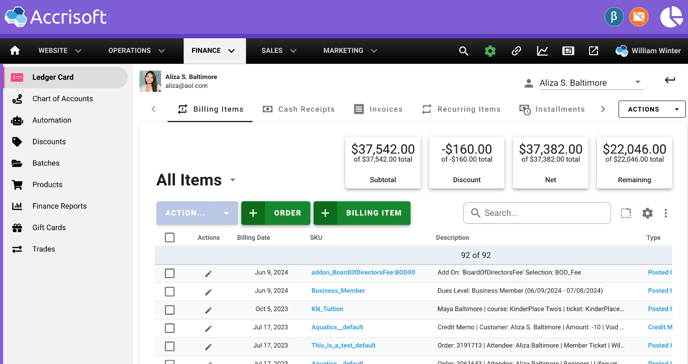
In this example we have a tuition Billing Item that is partially paid.
Click the Edit Pencil item next to the billing item you wish to convert to Installment payments.

This will allow you to review the details of the billing item. On the Billing Item tab you can see information such as the total amount of the Billing Item, the payments applied and the Balance Remaining on the Billing Item:

On the Linked Items tab you can see payments made to the Billing Item:
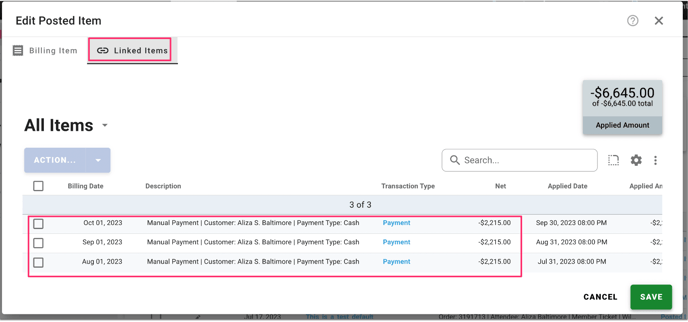
This will allow you to determine how many Installments will need to be created when creating the Installments.
In this example, three payments of twelve have been made to this billing item, so nine installments need to be created.
Click the Cancel button to close the Billing Item detail.
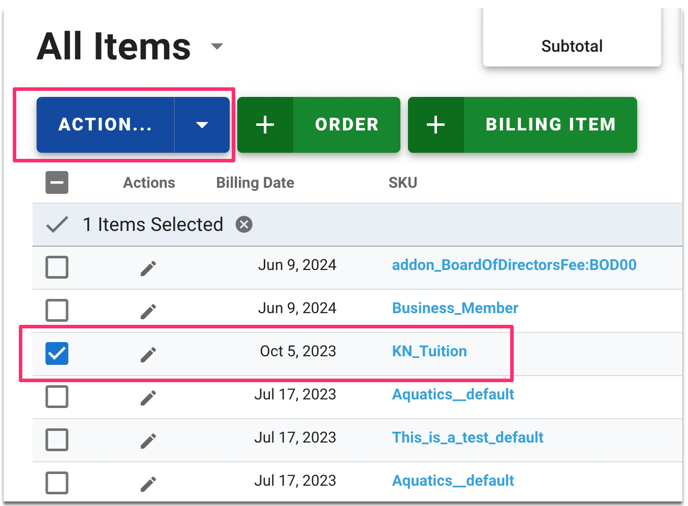
Once back at the list of Billing Items, place a Check Mark in the box at the left side of the Billing Item you wish to convert to Installments. This will activate the ‘Action…’ menu:
Click on the ‘Action…’ menu and select the ‘Installments’ option:
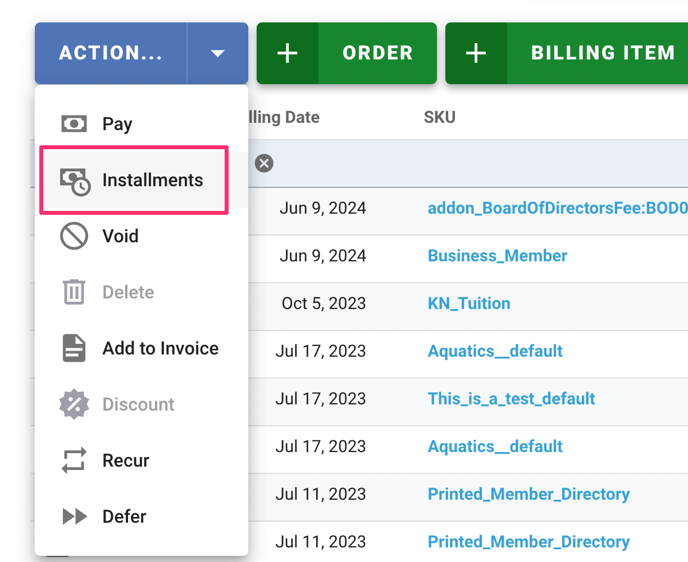
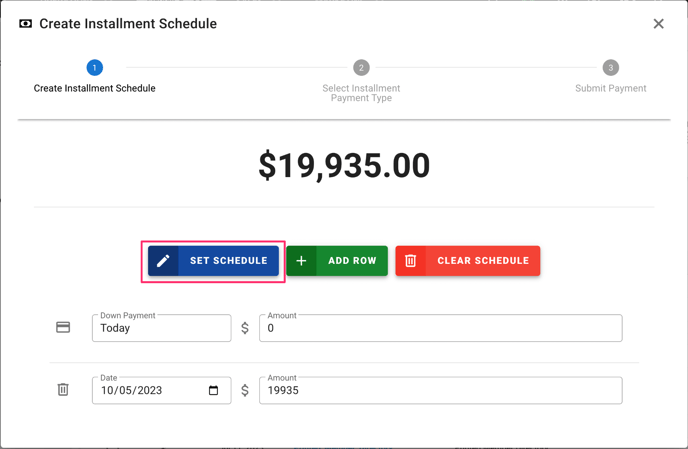
This will present the Create Payment Schedule window.
Click the blue ‘Set Schedule' button to set up a custom Installment schedule:
You can now configure the schedule in the ‘Generate Schedule’ window.
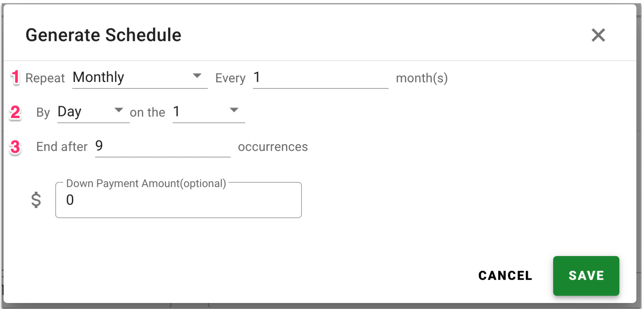
Item 1: Set the Repeat Information. In this case we repeat Monthly, every Month.
Item 2: We set the day of the month to be the first day of the Month with a 1.
Item 3: We end after 9 occurrences, as this is the number of installments remaining.
A Down Payment Amount is optional, but can be added if appropriate.
Click the green ‘Save’ button and the Installment Schedule will be generated:
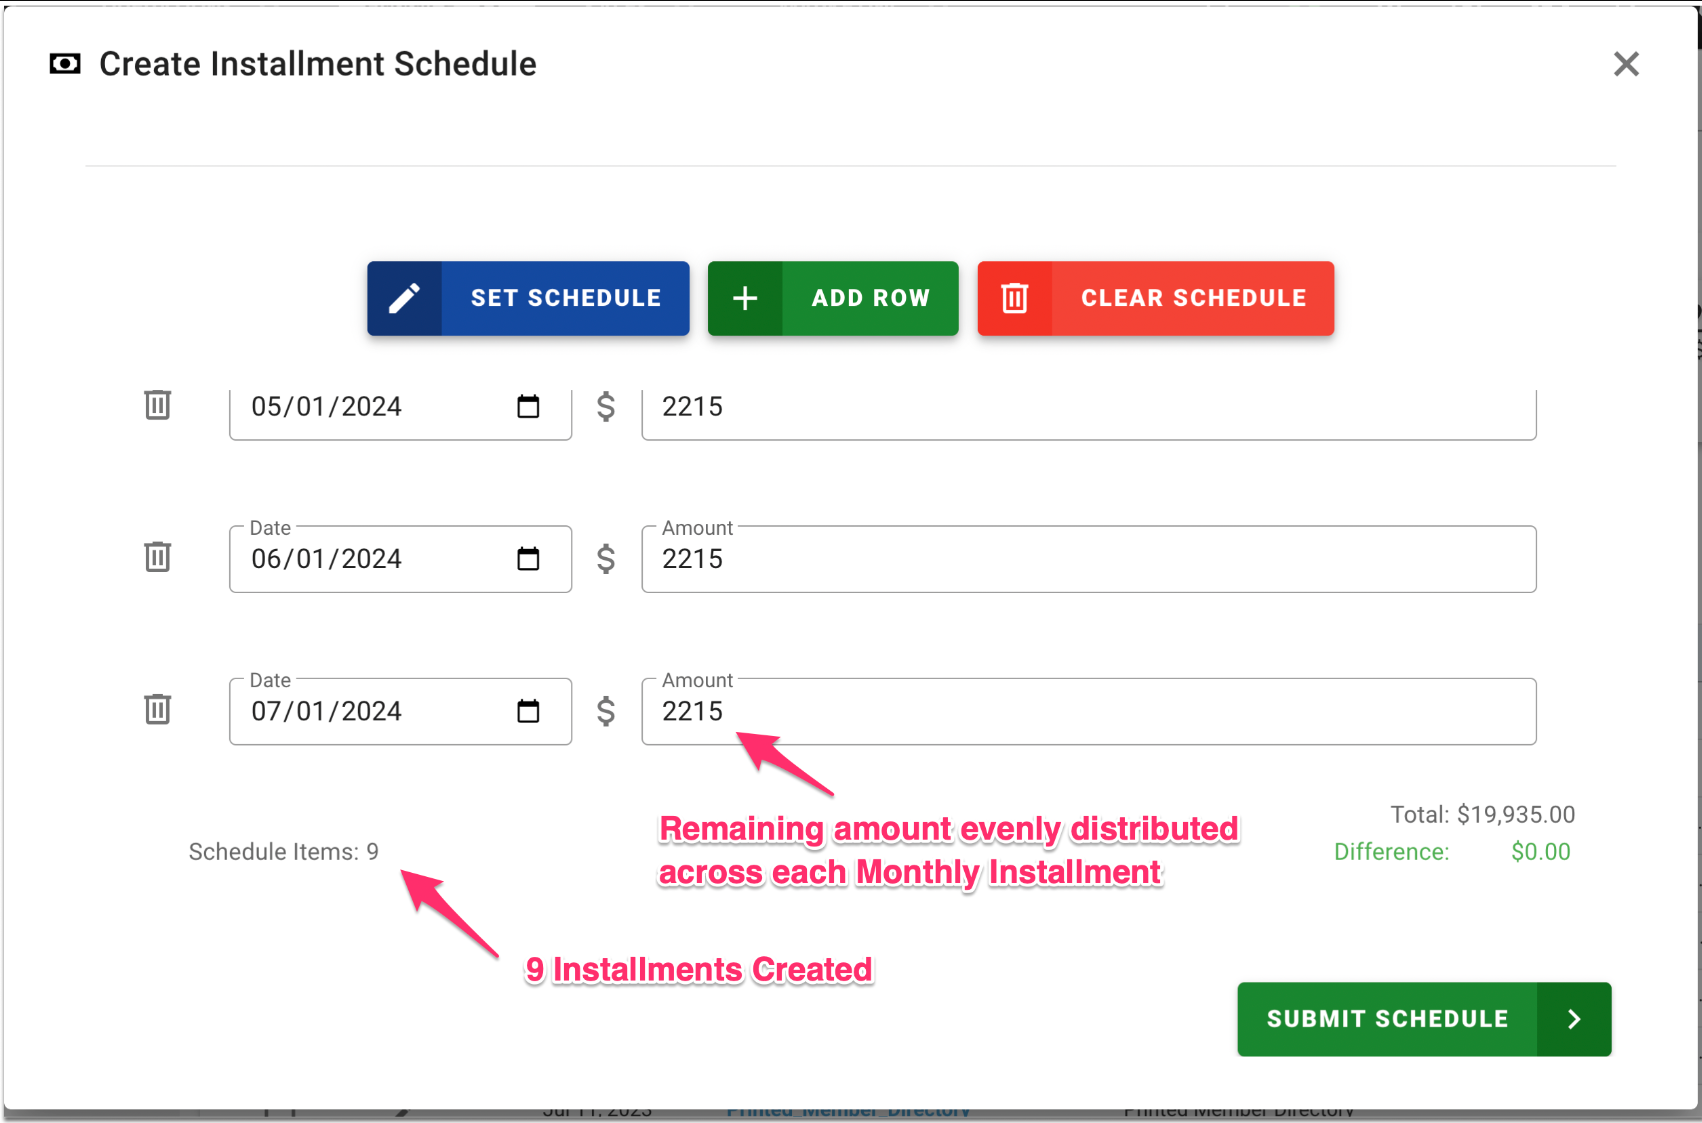
The 9 Installments are created. The remaining amount is evenly distributed across each of the installments. Click the green ‘Submit Schedule’ to continue.
In the next step, we select the Installment Payment Type.
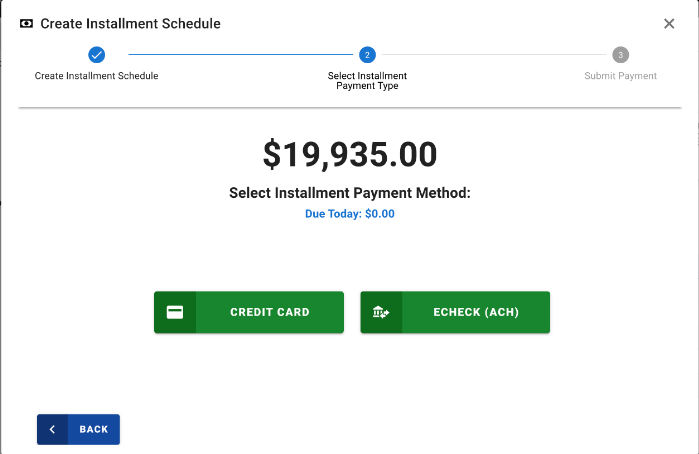
In this case we will select the green Credit Card button, and ECheck (ACH) is an option.
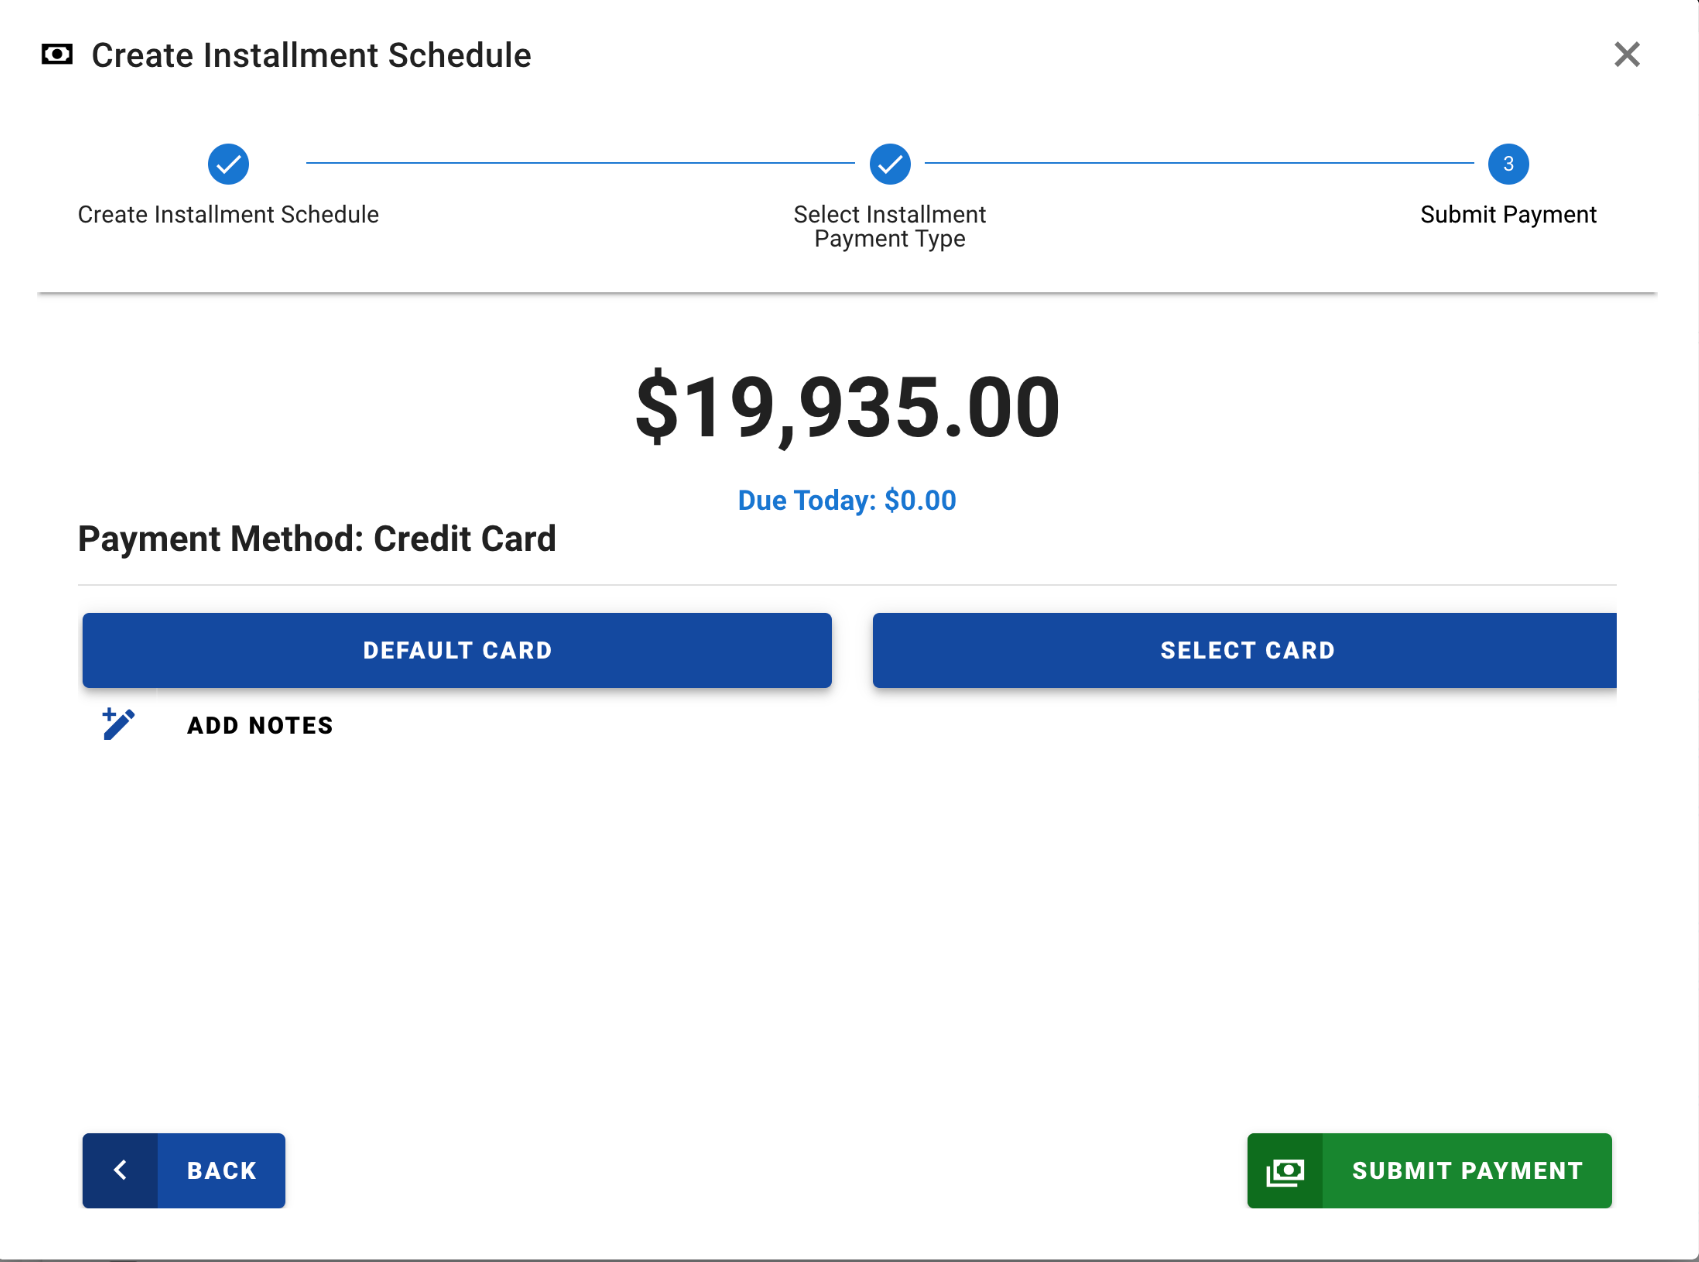
We can choose the Default Card on file in their Contact Database record, or we can select an alternate card. In this example we will click ‘Select Card’ to choose an alternate card.
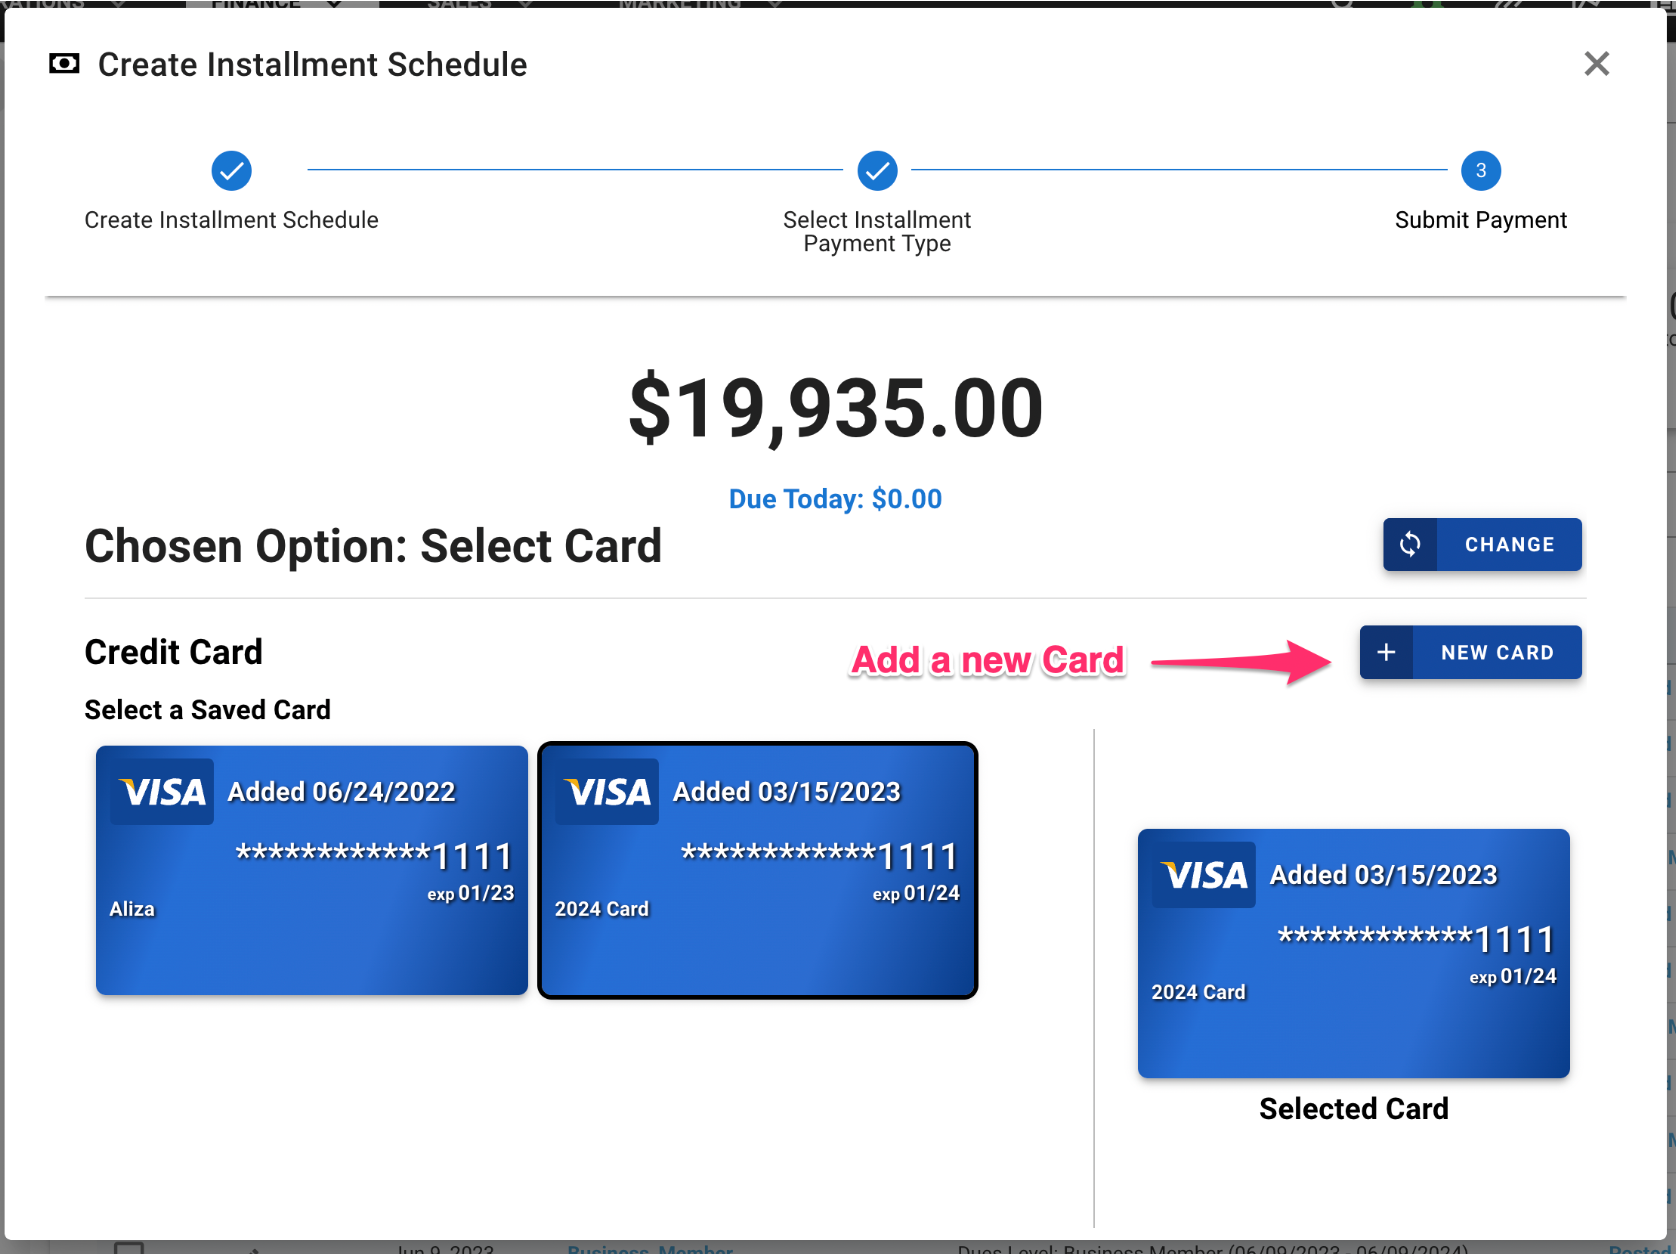
We can add a new Credit Card for these installments, or select from any of the cards on file in their Contact Database record.
In this example we will select the card with the 2024 expiration date.
Scroll to the bottom of the window and select the green ‘Submit Payment’ button.
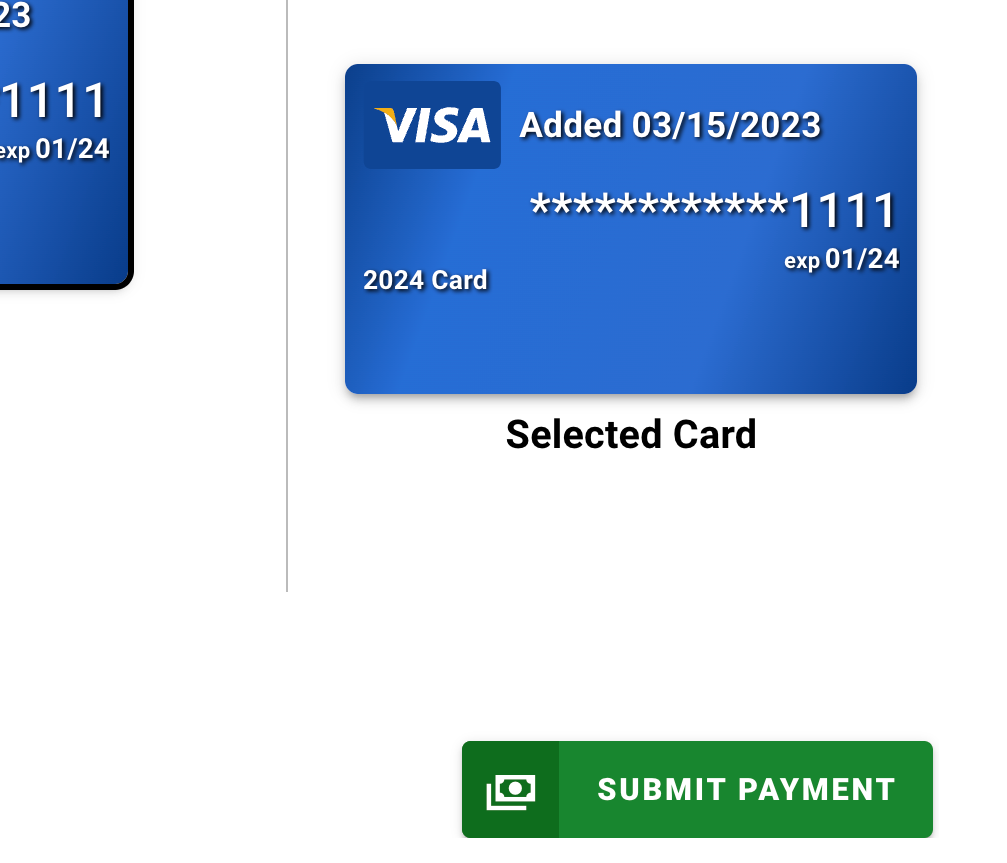
The Installment Schedule will be created, and you will have an option to Email or Print a receipt for your customer.

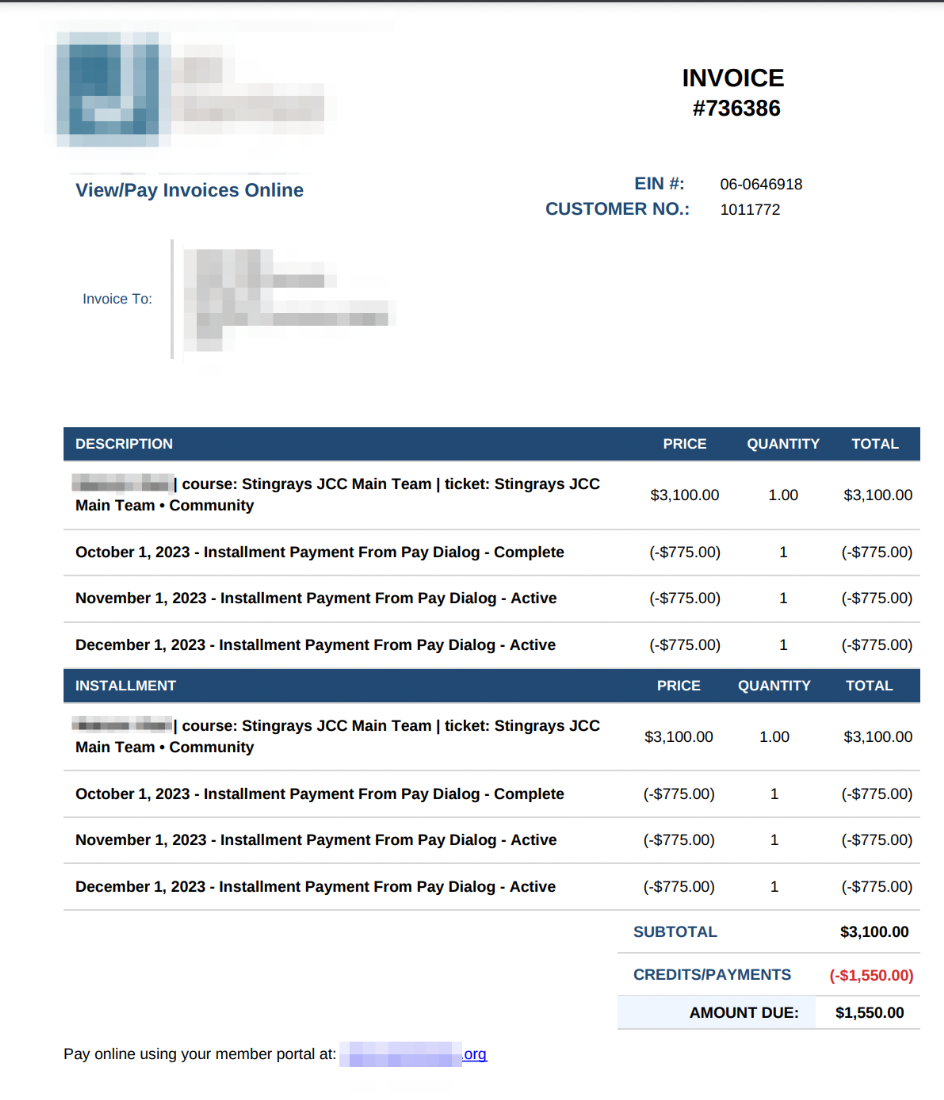
Be sure to select the ‘Installments’ Invoice Template when Emailing or Printing:
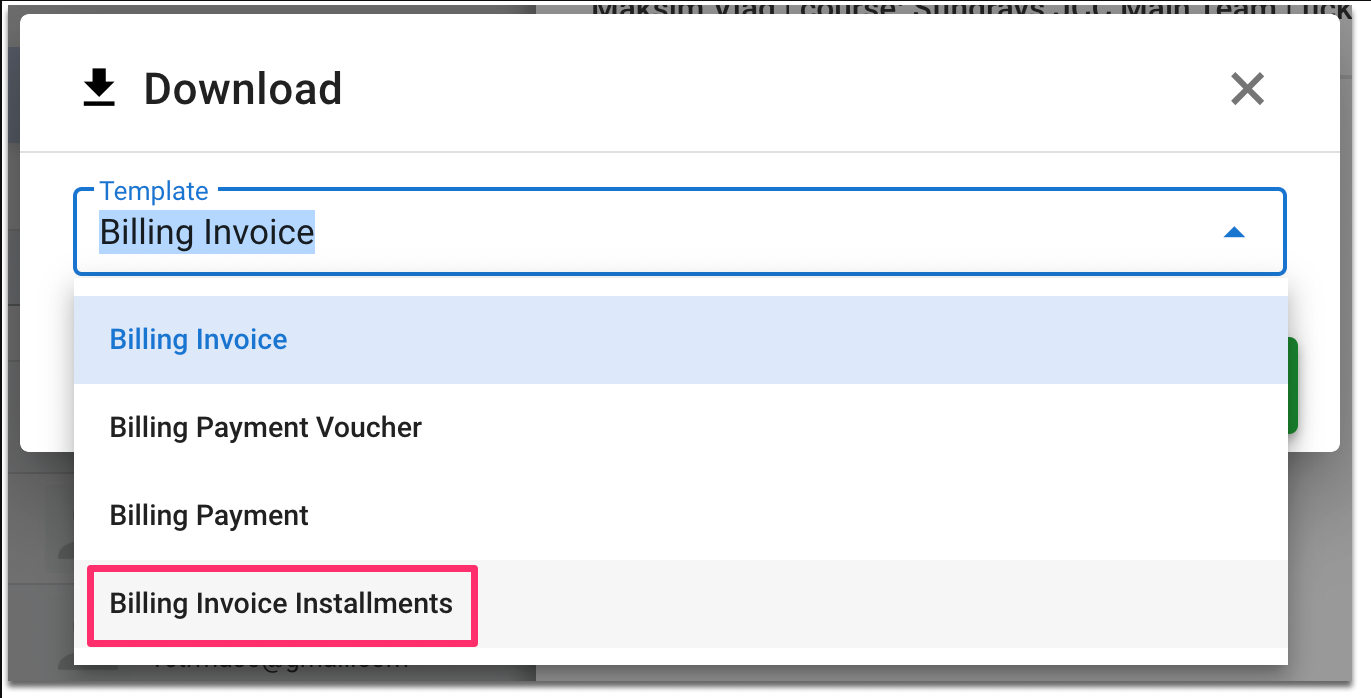
This will ensure an Installments Invoice is created:
Click the green ‘Finish’ button to complete the process.
Once created, the Installments can be found under the ‘Installments’ tab of the customer’s Ledger Card:
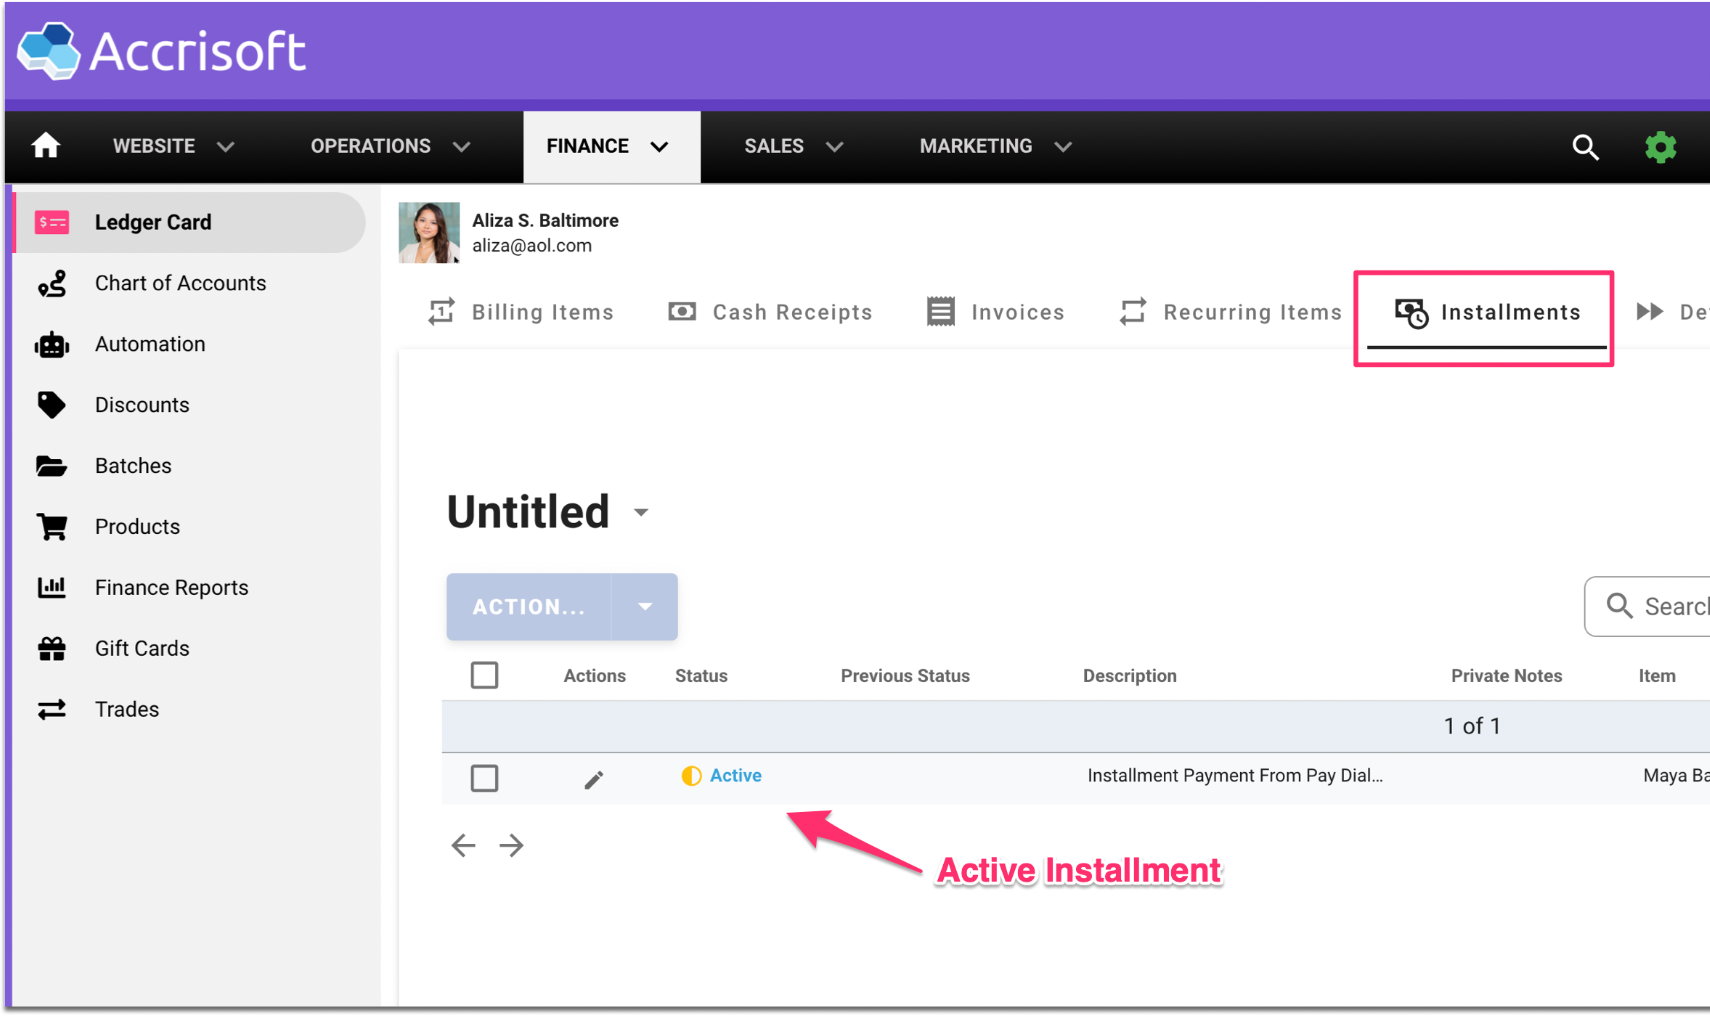
Editing the Installment will allow you to change the settings of the Installment.
![accrisoft_logo_med.png]](https://help.accrisoft.com/hs-fs/hubfs/accrisoft_logo_med.png?height=50&name=accrisoft_logo_med.png)